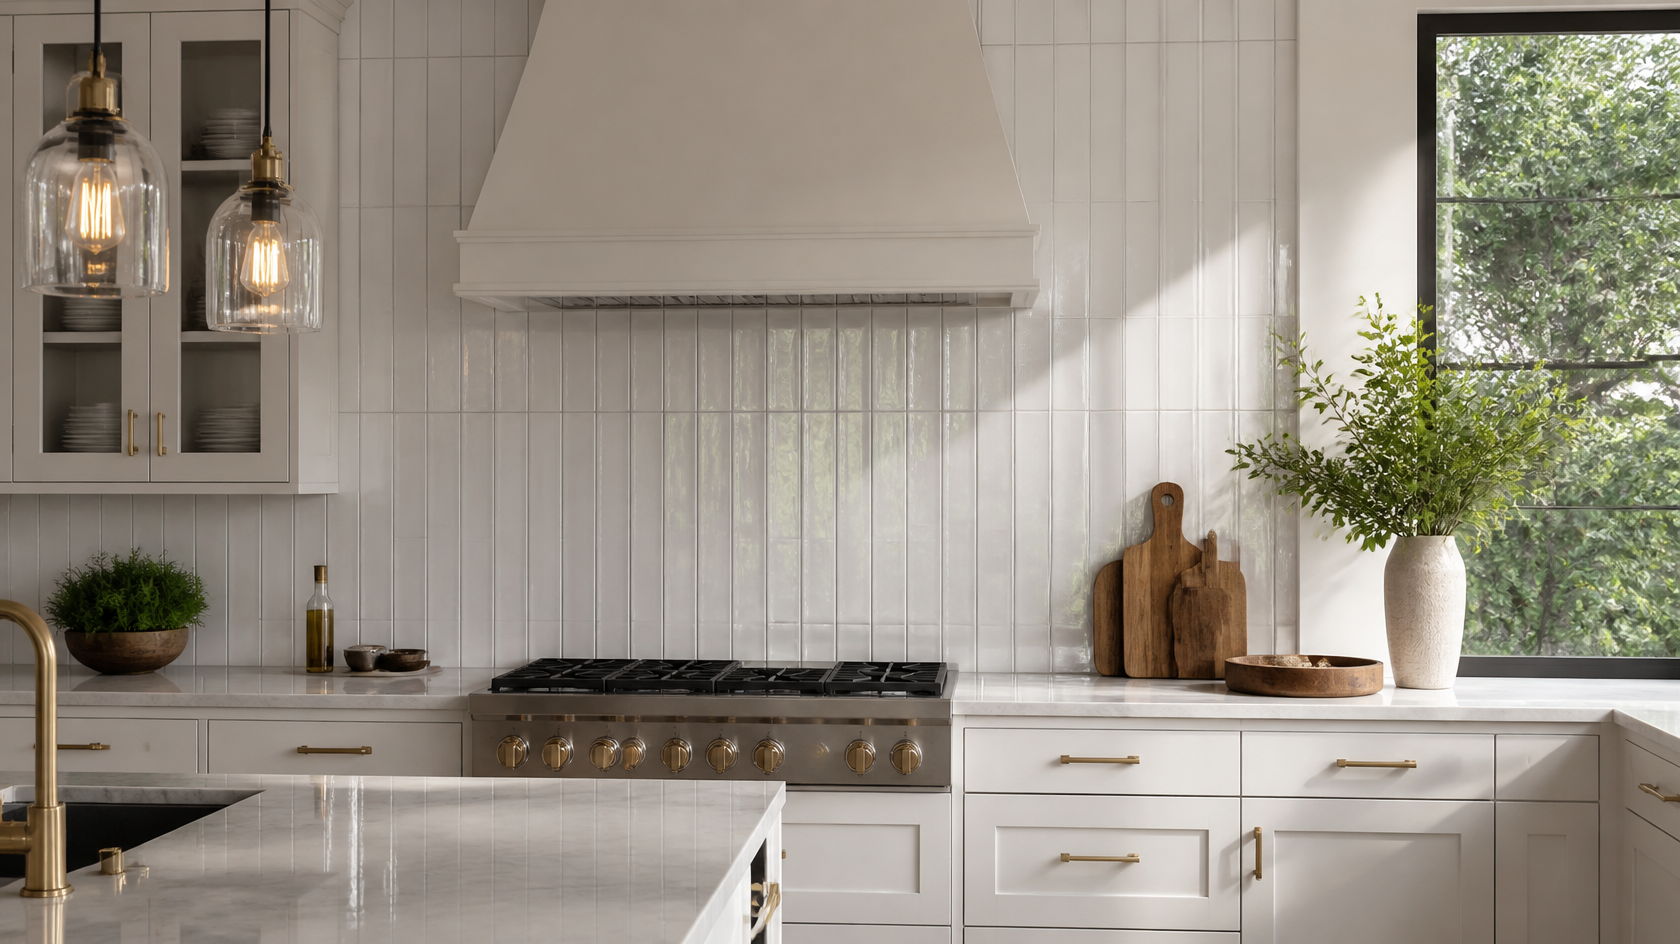
This is the one spot in the kitchen where you can take a swing. The wall behind the cooktop:
- Is the focal point of any kitchen
- Often has no upper cabinets (range hood handles that zone)
- Is naturally framed by uppers on either side
- Reads as art when you nail it
Designers in 2026 are doing one of three things here:
- Slab statement — single porcelain slab in dramatic stone pattern (Calacatta Viola, Taj Mahal, Patagonia)
- Zellige in a saturated color — full-height in sage, deep green, or terracotta
- Pattern tile — fish scale, arabesque, or hand-painted tile in a focused install
The rule of thumb: spend 1.5-2x your per-sq-ft tile budget on the behind-stove wall. It's a small area (typically 15-25 sq ft) where money shows the most.

The mechanics of using AI to test backsplash options are straightforward. Here's the workflow that works.
Stand at the opposite wall, hold the phone horizontal at chest height, frame the kitchen so you capture cabinets, counters, and the backsplash wall in one shot. Daylight is best; avoid harsh shadows. Resolution matters — use the main camera, not the wide-angle (wide-angle distorts).
Upload the photo to GenRoom. The tool detects the kitchen layout — cabinets, counters, backsplash wall, appliances — and prepares it for redesign.
This is the key move. You don't want to redesign the whole kitchen — you want to keep your cabinets and counters and only change the backsplash. Use the AI Editor with a focused prompt like:
"Replace the existing backsplash with handmade sage green zellige tile, full-height behind the stove, 1/16 inch grout joints, warm white grout"
The AI keeps cabinets, counters, floor, and lighting consistent while rendering the new backsplash photorealistically.
Run 6-10 variations on the same kitchen photo. Suggested test sequence:
- Classic 3x6 white subway, horizontal, warm gray grout
- 4x12 vertical stack subway, white on white
- Marble herringbone (Carrara), thin warm gray grout
- Sage green zellige, full-height, warm white grout
- Hex mosaic in charcoal, white grout
- Calacatta porcelain slab (no grout), full-height
- Fish scale in deep ocean blue, full-height behind stove only
- Brick veneer, full-height
Save all results. Put them in a folder together. Look at them on the same screen size. Eliminate any that look "off" — wrong scale, wrong color, fighting with the countertop. The survivors are your real shortlist.
AI gets you 90% of the way there. For the final cut, order physical samples from Home Depot, Lowe's, or specialty tile shops like Clé Tile or Fireclay. Tape the samples to your actual wall, look at them in morning, midday, and evening light, and then decide.
After analyzing hundreds of backsplash installs and the kitchens where they aged badly, the same six mistakes show up.
If your counter is a busy patterned quartz (white with heavy gray veining), don't use a busy patterned backsplash. The two patterns fight. Pick one hero, make the other quiet. Calacatta countertop = subway tile or solid-color zellige. Solid white quartz = go busy with tile (herringbone, fish scale, hex).
People agonize over tile color and then accept the installer's default grout. Always specify grout color separately. Ask your installer to dry-lay 4-5 tiles with two grout color samples (one matching, one contrasting) before committing. The difference is shocking.
The trendiest 2026 tile is the most-dated 2030 tile. If you genuinely love a trend-forward look (terrazzo, fish scale, bold zellige color), buy it. If you're choosing it because Pinterest told you to, stick with timeless patterns: subway, marble herringbone, neutral zellige. They look right in 2010 photos and they'll look right in 2035.
Most kitchens have outlets, switches, or a range hood vent in the backsplash zone. Plan tile cuts around them. A tile pattern that ends mid-cut at an outlet looks amateur. If you can, relocate outlets during demo to fall in grout lines or symmetrically.
Dark zellige, charcoal hex, deep navy mosaic — gorgeous in magazine photos taken in a 250 sq ft loft kitchen with windows on three walls. In a small or low-light kitchen, they swallow the room. Test the dark option in AI first to see how it actually reads in your specific lighting.
Always pick cabinets first, then countertop, then backsplash. The backsplash is the easiest piece to change later and the most expensive to choose wrong. Cabinets are 50-60% of a kitchen budget; the backsplash should support them, not the other way around.
| Material | Durability | Cleaning | Heat Near Stove | Water/Steam | Cost Range |
|---|
| Ceramic | High | Easy | Excellent | Excellent | $-$$ |
| Porcelain | Very high | Easy | Excellent | Excellent | $-$$$ |
| Glass | High | Very easy | Good | Excellent | $$-$$$ |
| Marble (sealed) | Medium | Moderate (acid stains) | Good | Moderate (porous) | $$-$$$$ |
| Travertine | Medium | Moderate | Good | Moderate (porous) | $$-$$$ |
| Zellige | High | Easy | Excellent | Good | $$$-$$$$ |
| Terrazzo | Very high | Easy |
Heat-near-stove tip: Anything porous (marble, travertine, unsealed brick) will absorb cooking oils over time. Either pick non-porous material (ceramic, porcelain, glass, zellige, stainless) for the cooktop zone or commit to sealing every 12-18 months.
GenRoom is purpose-built for room redesign from a photo — including focused changes like swapping only the backsplash. The AI Editor lets you describe a specific change ("replace the backsplash with green zellige") and keeps everything else in the kitchen — cabinets, counters, floor, appliances — visually consistent. That's the workflow that matters here. Whole-kitchen redesign tools are great for early-stage exploration; backsplash decisions need precision edits.
Once you have your shortlist of 3-5 photorealistic options, you have something to show your installer, a tile selection brief that's worth a fraction of a designer's hourly rate, and zero risk of buying $2,000 of tile that turns out to be the wrong color in your light. The math is obvious.
GenRoom is the strongest pick for backsplash-only changes because the AI Editor allows focused edits — swap the backsplash without redesigning cabinets or counters. Whole-kitchen redesign tools work too but require more prompt engineering to lock everything else in place.
A typical 30 sq ft kitchen backsplash costs $300-$1,500 installed for basic ceramic subway, $1,500-$3,500 for premium mid-range (zellige, marble mosaic, herringbone), and $3,500-$8,000+ for high-end (porcelain slab, full-height statement). Tile material is $2-$60/sq ft depending on type; labor adds $5-$20/sq ft.
For the behind-stove zone — yes, almost always. For the entire kitchen — depends on cabinets. Open-shelf kitchens or kitchens with limited upper cabinetry benefit from full-height. Kitchens with traditional upper cabinets often look over-designed at full-height. The hybrid approach (full-height behind range, 18" strip elsewhere) is the smart-money 2026 default.
Classic 3x6 ceramic subway tile in white or warm white, installed horizontally with warm gray grout. It looked right in 1910, it looks right in 2026, and it will look right in 2050. Marble herringbone (Carrara) and neutral zellige are also genuinely timeless. Avoid anything in saturated trend colors if you're optimizing for longevity.
Three rules: (1) matching grout (white grout/white tile) = monolithic, calm, modern; (2) contrasting grout (dark grout/white tile) = graphic, traditional, retro; (3) for handmade tiles like zellige, use thin warm-toned grout (off-white, beige, or warm gray) at 1/16" joints. When in doubt, warm gray is the universal safe pick — clean enough to look intentional, dark enough to hide cooking splatter.
Peel-and-stick — yes, anyone can. Standard subway tile — yes, if you've laid tile before and have a wet saw. Pattern installs (herringbone, hex, zellige) — only with prior experience. Slab — no, requires fabrication. DIY saves $5-$20/sq ft in labor but costs you the warranty and the cleanup if it goes wrong. For zellige, marble, or large-format slab specifically, hire a pro.
White cabinets are the most forgiving base — almost any backsplash works. The hottest 2026 specifications: sage green zellige, deep navy or charcoal hex, marble herringbone, classic subway with warm gray grout. Avoid: bright white subway with bright white grout (reads sterile), saturated multicolor mosaics (compete with white cabinets).
Dark cabinets need a lighter or contrasting backsplash to keep the room from feeling heavy. Best picks: marble herringbone or subway in warm white, classic 3x6 subway with white or warm gray grout, large-format Calacatta porcelain slab, terracotta or warm-white zellige. Avoid: dark backsplash on dark cabinets (cave effect), busy multicolor patterns.
For a rental or a 1-3 year solution — yes, it's a legitimate budget option. For a permanent kitchen — no. Peel-and-stick degrades near heat (avoid behind the cooktop), captures cooking grease, and lifts at the edges over time. If budget is the constraint, basic ceramic subway with DIY installation is a better long-term spend.
A properly installed ceramic, porcelain, or glass backsplash lasts 30+ years structurally — the tile itself doesn't fail. The decision to replace is almost always aesthetic (style dated) rather than structural. Natural stone backsplashes (marble, travertine) last as long but need re-sealing every 2-3 years. Peel-and-stick has a 3-7 year practical life.
Backsplash decisions used to be guesswork — small samples, mood boards, and hoping the tile reads right in your kitchen. AI visualization changes that. You upload one photo, test fifteen options, eliminate the ones that fight with your cabinets, and walk into the tile store knowing exactly what you're buying.
The patterns worth testing in 2026: classic subway (still the workhorse), zellige (the hottest specification), marble herringbone (timeless luxury), large-format slab (the new high-end default), and one of fish scale, hex, or terrazzo if you want personality. The patterns to skip unless you're sure you love them: dark grout on subway, glass mosaic, anything you saw on Instagram last week.
Spend twenty minutes in GenRoom testing options on your real kitchen photo before you spend twenty hours visiting tile showrooms. The savings — in time, in money, and in the kitchen you actually end up with — are obvious.