Outdoor kitchens touch gas, electric, plumbing, structural work and sometimes fire suppression -- and every one of those triggers permit requirements in most US, Canadian, European and Australian jurisdictions.
Gas lines are non-negotiable professional work. Running a natural gas line from your home's main to a backyard grill requires a licensed plumber or mechanical contractor in nearly every jurisdiction. Expect $500-$2,000 for the gas line work alone depending on distance and trenching. Propane setups with portable tanks can skip the permit in most areas but still require code-compliant connections.
Electrical work for an outdoor kitchen always requires a permit if you're adding circuits. Code requires GFCI protection on every outdoor outlet, weatherproof in-use covers, and dedicated circuits for refrigeration (15A) and any electric appliances. A typical outdoor kitchen needs two to four 20A circuits. Budget $1,500-$4,000 for new electrical work depending on panel distance.
Plumbing for a sink means a hot/cold water supply, a drain that connects to your home's waste system, and -- in freeze-prone climates -- a shut-off valve and drain mechanism inside the conditioned envelope of the house. Plan $1,000-$3,500 for plumbing depending on distance to existing lines.
Permits themselves typically cost $200-$800 in most US municipalities and require submitted plans, inspections at rough-in and final stages, and contractor licensure verification. Skipping permits is the single most common cause of homeowner regret -- unpermitted outdoor kitchens routinely cause real-estate sale problems and insurance claim denials.
Where you live changes nearly every materials and appliance decision.

Freeze-prone climates (most of the US north of Atlanta, all of Canada, Northern Europe, mountain regions) require special handling for any plumbing. Water supply lines must be drainable or use frost-protected hose bibbs; a shut-off valve inside the house lets you blow out the lines before first freeze. Pour-in-place concrete with proper expansion joints survives freeze-thaw; thin tile veneer over inadequate substrate will pop within 2-3 winters.
Hot, sunny climates (Southwest US, Mediterranean, Middle East, Australia) need UV-stable materials. Direct sun degrades polymer cabinet doors, fades colored grout, and turns black countertops into 160°F surfaces in summer. Plan for shade -- pergolas, awnings, or strategic tree planting -- and choose lighter-colored counters wherever possible.
Coastal/salt-air climates (any location within a mile of saltwater) require marine-grade 316 stainless steel for any metal component. Standard 304 stainless will develop rust spots within 1-2 years of salt exposure. Choose closed-back appliances over open-back models, and rinse the kitchen with fresh water every few weeks.
Humid climates (Southeast US, tropics, monsoon regions) accelerate mildew, corrosion and wood rot. Specify outdoor-rated drawer slides, marine-grade sealants, and ventilated cabinet designs that don't trap moisture. Pressure-treated framing lumber buried in stucco or stone facades is a common shortcut that fails within 5 years in real humidity.
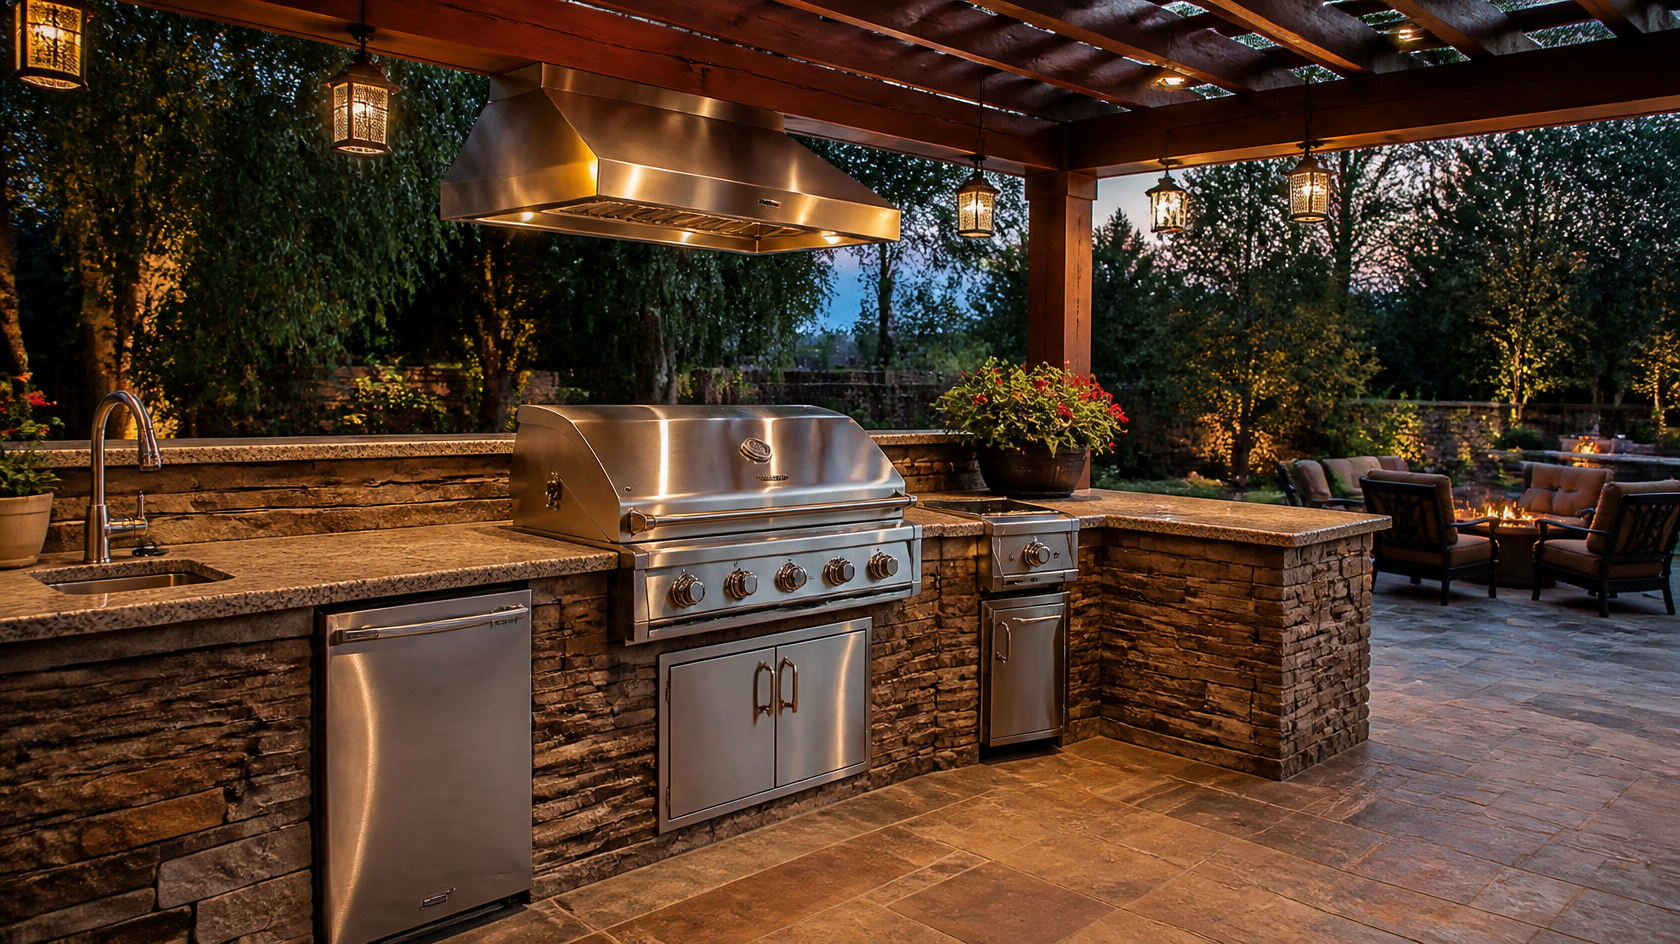
The hardest part of planning an outdoor kitchen has always been picturing it: the patio looks empty, and even careful sketches don't show how a stone L-shape with pergola will actually feel from the back door. AI tools like GenRoom's yard design tool close that gap by generating photorealistic renderings directly from your phone photo.

The workflow is genuinely simple and takes about 5 minutes per concept.
Step 1: Photograph your patio or yard in good light, ideally midmorning or late afternoon. Stand back far enough that you capture the entire intended kitchen footprint, the surrounding hardscape, and at least one wall of context. A clean, uncluttered photo gives the AI more interpretive room. Avoid harsh midday shadows or backlit shots.
Step 2: Upload to GenRoom's yard tool at genroom.io/generate/yard. The system auto-detects yard boundaries, existing structures, lighting direction and ground material.
Step 3: Pick a style -- Modern Concrete, Mediterranean Stone, Rustic Wood-Fire, Industrial, Coastal, Farmhouse. Each style maps to a coherent set of materials, appliance choices and pergola or covered-roof options.
Step 4: Review the variations. You'll get multiple photorealistic concepts -- typically L-shape, island and U-shape variants of your chosen style. Compare them side by side. The renderings show the kitchen at your yard's actual scale, in your existing lighting, with realistic materials and proportions.
Step 5: Iterate. GenRoom's AI editor lets you refine results with text prompts: "make the countertop dark granite instead of concrete," "add a pizza oven on the right," "swap the bar stools for backless." Most homeowners run 5-10 iterations before landing on a final concept.
Step 6: Share with contractors. The output is high-resolution and works as a visual spec sheet for landscape designers, masonry contractors and outdoor kitchen builders. You'll get more accurate bids because the contractor sees exactly what you want -- not a vague description.
This workflow doesn't replace the contractor or the structural engineer who validates the gas line route. What it does is compress weeks of "I think I want a kind of L-shape with maybe stone" into a clear, shareable visual decision in an afternoon. For homeowners spending $20,000-$50,000 on an outdoor kitchen, that clarity is worth its weight in granite.
After reviewing planning guides from This Old House, Family Handyman, BBQGuys and dozens of contractor blogs, the same mistakes appear over and over.
1. Undersized counter space. The number-one regret of outdoor kitchen owners. Plan 24 inches of counter to the left of the grill and 18 to the right, minimum. Skip this and you'll plate dinner on the grill lid forever.
2. Wrong grill placement. Position the grill so prevailing winds carry smoke away from the dining and seating areas, not into them. Also avoid placing the grill under low-hanging eaves -- you'll wash smoke stains off your soffits every year.
3. Ignoring drainage. Outdoor sinks, ice makers and beverage coolers all need real drainage. Group "wet" appliances in one zone and tie them into your home's plumbing or a properly sized drywell. A drainpipe that just ends in the dirt next to the patio is a future mold problem.
4. Too small a patio. A 10x10 patio with an outdoor kitchen feels claustrophobic the moment you have four guests. Plan at least 4 feet of clearance behind the cook and 3 feet around dining furniture.
5. Skipping the sink and fridge. Cheap to omit upfront, painful to add later. The retrofit cost of plumbing and a fridge circuit can be 3-5x the original installation cost.
6. Cheap cabinetry. Outdoor cabinets are the most common failure point. Plywood with stone veneer looks identical to marine-grade stainless on day one. Year three tells a different story. Stainless, HDPE or solid masonry only.
7. No shelter from sun or rain. Open-air outdoor kitchens in any climate with real summer heat or unpredictable rain get used 30-40% less than covered ones. A pergola is the single best ROI addition to most outdoor kitchen budgets.
Every outdoor kitchen falls into one of a handful of style families. Knowing which one resonates with your home's architecture is the fastest path to a coherent result.

Modern Minimalist. Monolithic concrete or porcelain slab, integrated stainless appliances, hidden hood, no upper cabinets, clean horizontal lines. Pairs with contemporary architecture, flat roofs, and dark hardscape.
Mediterranean. Hand-painted tile backsplash, terracotta or stucco facade, arched openings, wood-fired pizza oven, wrought-iron pendant lights, terracotta floor tile. Loves bougainvillea and olive trees.

Rustic Wood-Fire. Open hearth grilling, butcher block counters, copper or cast-iron accessories, reclaimed beams overhead, exposed brick or fieldstone. Argentine-asado influence is increasingly common.
Industrial. Black steel framing, exposed concrete, raw metal facades, Edison bulb pendants, dark stained wood accents. Pairs with mid-century modern and warehouse-conversion homes.
Coastal. Whitewashed cedar, light stone counters, blue accents, woven natural fiber barstools, marine-grade everything. Salt-air durable.
Farmhouse. Shiplap or board-and-batten facades, butcher block counters, apron-front farmhouse sink, lantern-style lighting, white or sage cabinetry. Best with traditional or craftsman homes.
Most outdoor kitchens cost $13,000-$17,000 on average in 2026, with the full range spanning $5,000 for DIY budget builds to $150,000+ for luxury custom installations. The grill typically takes 30-50% of the budget. Pre-fab modular kits run $7,000-$16,000; custom mid-range builds with sink, fridge and utilities run $15,000-$35,000.
In most US, Canadian, European and Australian jurisdictions, yes -- any outdoor kitchen with a gas line, electrical wiring, plumbing or a structural roof/cover requires a permit. Permits typically cost $200-$800 and require submitted plans and inspections. Freestanding grills with no built-in utilities usually don't need permits, but anything beyond that does. Skipping permits causes real-estate sale problems and insurance claim denials.
Yes, with proper preparation. Cover or store appliances that aren't weather-rated, drain all water lines before first freeze, shut off the water supply with an indoor valve, and use a grill cover. A covered pergola or pavilion makes winter use far more practical. Many homeowners in cold climates use their outdoor kitchens year-round for grilling -- the appliances handle freezing temperatures fine; the plumbing is what needs winterization.
A built-in outdoor kitchen is custom site-constructed with masonry or framed-and-faced walls, allowing custom dimensions and finishes ($15,000-$35,000+). A modular outdoor kitchen ships as pre-built ready-to-assemble units ($7,000-$16,000), is faster to install, but offers less flexibility in layout and dimensions. Modular is great for first-time outdoor kitchens; built-in suits long-term forever-home investments.
A pre-fab modular outdoor kitchen takes 1-3 days to assemble after the patio is ready. A custom built-in kitchen takes 3-6 weeks from permit approval to final inspection, depending on complexity. The longest delays usually come from permit approval (1-4 weeks), gas line installation scheduling, and weather. Plan to start planning at least 2 months before you want to use the finished kitchen.
If your home already has natural gas service, run a line to the outdoor kitchen -- it's a one-time cost ($500-$2,000) and eliminates tank swaps forever. If natural gas isn't available, propane is fine and far cheaper to install. A 20-pound propane tank lasts 18-20 hours of grilling at $20-$25 to refill, and most built-in grills support either fuel with a conversion kit.
Yes. AI tools like GenRoom analyze your existing yard photo, detect boundaries and existing features, then generate photorealistic outdoor kitchen concepts at your yard's actual scale. You can iterate on style, layout, materials and add or remove features (pizza oven, pergola, bar seating) through text prompts. The output won't replace a contractor's structural drawings, but it gives you a clear, shareable visual decision before you spend money on bids and construction.
Counter space, in two ways: total linear feet (plan 6-8 feet minimum) and the buffer around the grill (24 inches left, 18 right). Every other mistake is recoverable with money. Insufficient counter space turns even a $40,000 outdoor kitchen into a frustrating place to cook.
An outdoor kitchen is one of the highest-impact backyard investments you can make -- it changes how often you cook outside, how you entertain, and how the back of your home gets used 4-9 months of the year. The decisions that drive long-term satisfaction aren't the showy ones (the grill brand, the counter material). They're layout, counter space, weather protection and quality of cabinetry.
Use AI visualization tools like GenRoom to test layout options against your actual yard before you commit. Upload your photo, generate L-shape, U-shape and island variants, and see -- at real scale, in your real lighting -- which one belongs in your space. Then take that decision to a contractor with confidence. The clearer your vision before bids, the better your final kitchen, and the less you'll spend on revisions and regrets.