Sketch to Render AI: Turn Hand Drawings Into Real Renders
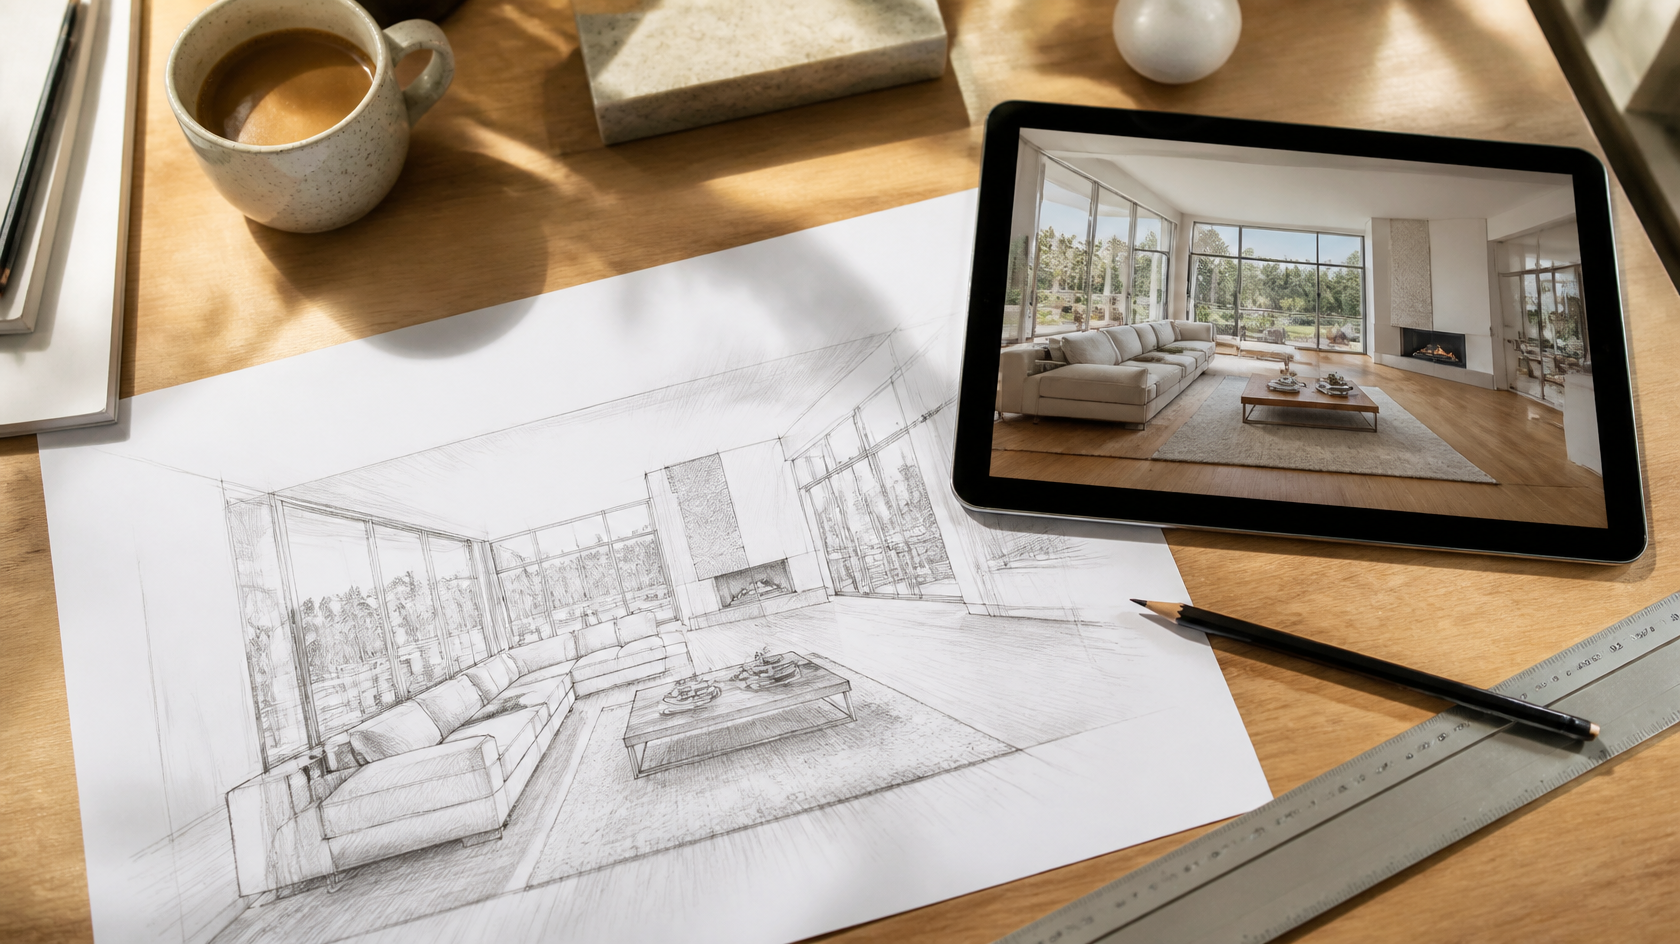
From a five-minute pencil sketch to a client-ready visual — sketch-to-render AI skips the 3D modeling in between.
Sketch to render AI turns a rough drawing — a hand sketch, a SketchUp screenshot, or a floor-plan doodle — into a photorealistic image in seconds, without any 3D modeling. You upload the drawing, tell the AI what materials and mood you want, and it reads your linework to produce a finished render that keeps your composition but adds real lighting, textures, and depth.
This guide covers what inputs actually work, the exact step-by-step process, and how designers, architects, and homeowners each use the technology. We also cover where it still falls short, so you know when to trust the output and when to redraw. Tools like GenRoom let you drop in a sketch and see a finished room or facade in about 30 seconds, so you can test ideas long before committing to a full render.
What is sketch to render AI?
Sketch to render AI is software that converts a 2D drawing into a photorealistic 3D-style render using a machine-learning model, no manual modeling required. Instead of rebuilding your idea in SketchUp, Revit, or 3ds Max and then setting up lights and materials, you hand the AI your existing sketch and it does the interpretation for you.
The model was trained on huge libraries of paired drawings and finished images. It learned to recognize edges, openings, depth cues, and shading, then predict what the same scene looks like as a real photograph. In practice this compresses a workflow that used to take hours or days into a wait of 10 to 30 seconds.
The key idea: the AI enhances your drawing rather than replacing it. A confident sketch with clear main shapes gives the AI a strong skeleton to build on. It fills in realistic materials, natural light, and fine detail while trying to respect the geometry you drew.
What inputs actually work?
Almost any clear 2D image works as long as the AI can read edges, depth, and openings. You do not need a polished technical drawing — you need clarity. Here is how the common input types compare.
| Input type | How well it works | Best for |
|---|---|---|
| Hand-drawn pencil sketch | Very good with confident lines | Early concepts, client napkin ideas |
| Marker or ink concept sketch | Excellent | Bold interior and exterior massing |
| SketchUp / CAD screenshot | Excellent | Turning gray massing models into finished visuals |
| Floor-plan doodle | Good for layout intent | Room arrangement and furnishing ideas |
| Tablet / digital line drawing | Very good | iPad Procreate concepts, precise linework |
| Elevation drawing | Good | Facade and exterior studies |
Hand-drawn sketches
A pencil or pen sketch works well when the lines are confident and the main shapes are easy to read. Draw the walls, windows, and major furniture as clean, closed shapes. If the sketch is faint, smudged, or overlapping, the AI may guess wrong and invent details you never intended. Photograph it in even light with no shadows across the paper.
SketchUp and CAD screenshots
A flat gray SketchUp model or a CAD elevation is one of the strongest inputs. The geometry is already precise, so the AI spends all its effort on materials and lighting instead of guessing structure. Export a clean screenshot — hide the axes, grid, and dimension lines — then upload it and describe the finishes you want.
Floor-plan doodles
A rough top-down floor-plan doodle communicates layout intent: where the sofa sits, how the kitchen wraps, where the bed goes. AI reads it as a spatial arrangement and can generate a furnished interior concept from it. For a deeper walkthrough of this specific workflow, see our guide on AI design from a floor plan.
 Even a quick graph-paper doodle carries enough layout intent for the AI to furnish and render the room.
How to turn a sketch into a render, step by step
The process takes under a minute once your drawing is ready. Here is the exact sequence.
- Prepare your sketch. Draw or export with clear, confident lines. Close off walls and openings. Remove clutter, guide marks, and grid lines that could confuse the model.
- Photograph or export it cleanly. Use flat, even lighting. A straight-on photo or a PNG/JPG export beats a skewed phone snap taken at an angle.
- Upload the image. Drop the file into the sketch-to-render tool. Most tools accept JPG and PNG.
- Choose a style and describe the finishes. Pick a design style — Scandinavian, modern, minimalist, industrial — and add a short prompt for materials and mood, like "warm oak floor, linen sofa, soft morning light."
- Generate and review. Wait 10 to 30 seconds. Compare the render against your intent — check that walls, windows, and the main layout survived.
- Refine. If a detail is off, adjust the prompt or edit one element with words or a brush without redoing the whole image.
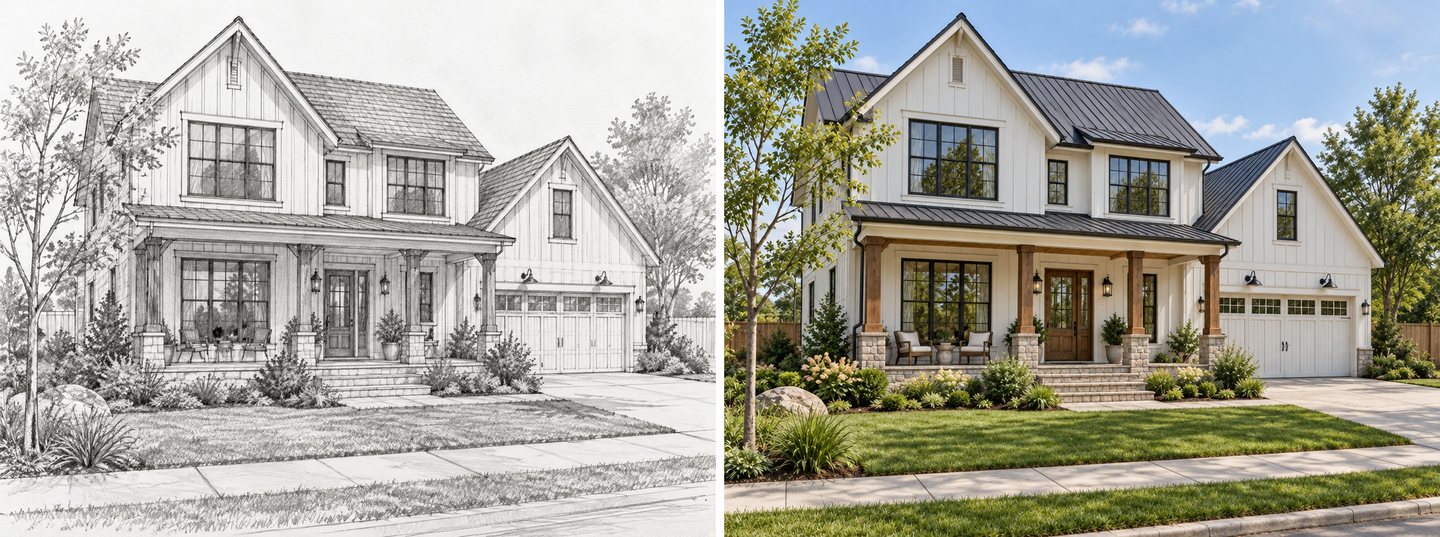 Real GenRoom Studio result: a pencil sketch uploaded to the Studio and rendered with "Exterior makeover".
The refinement step is where a text-based editor earns its keep. GenRoom's AI Editor (included in every plan, even Free) lets you type instructions like "change the floor to herringbone oak" or "add a pendant light over the island," or brush over an area and describe the change, so you fix one detail instead of regenerating and losing the parts you liked.
What can you use sketch-to-render AI for?
Sketch to render AI serves four distinct audiences, each with a different payoff. Below is how the value splits.
Interior designers
Designers use it to turn concept sketches into client-ready visuals during the first meeting, not a week later. It shortens the ideation loop: sketch three layout ideas, render all three in a minute, and let the client react to photorealistic options instead of abstract line drawings. That speed keeps momentum and reduces back-and-forth.
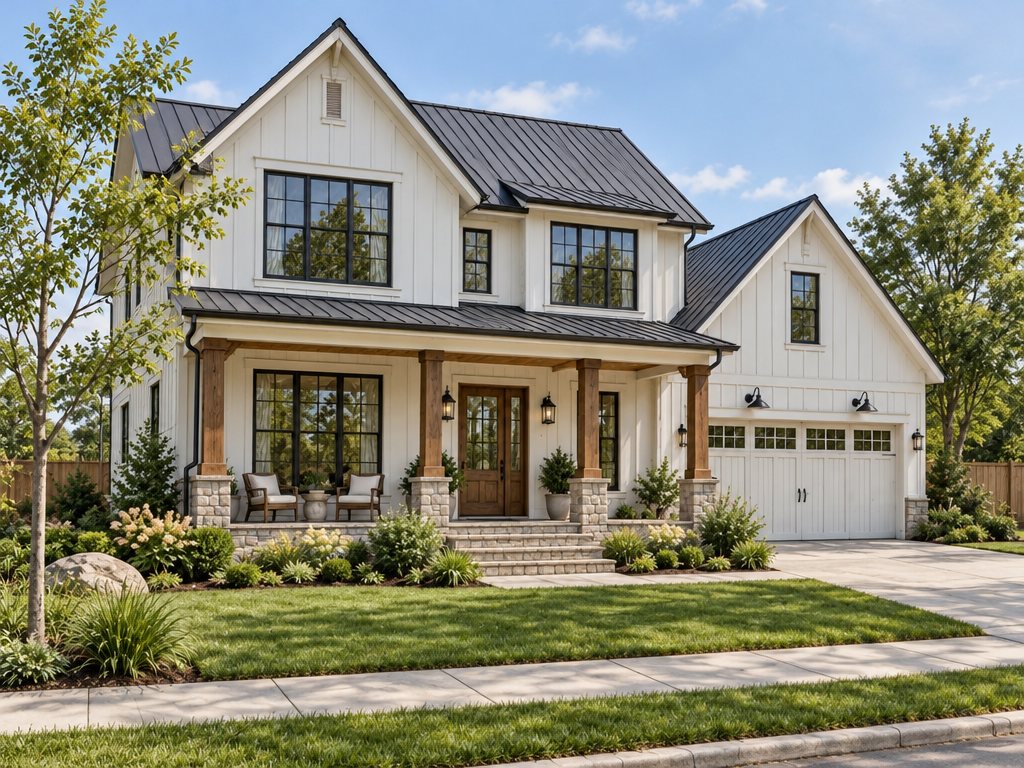 Real GenRoom Studio result: a pencil sketch uploaded to the Studio and rendered with "Exterior makeover".
Architects
Architects lean on it in early conceptual phases, when hand sketches and massing studies dominate. A gray SketchUp screenshot becomes a materialized facade in seconds, so the team can evaluate cladding, glazing, and proportion long before investing in a full render. It is a study tool, not a construction document — but for exploring direction, it is fast and cheap.
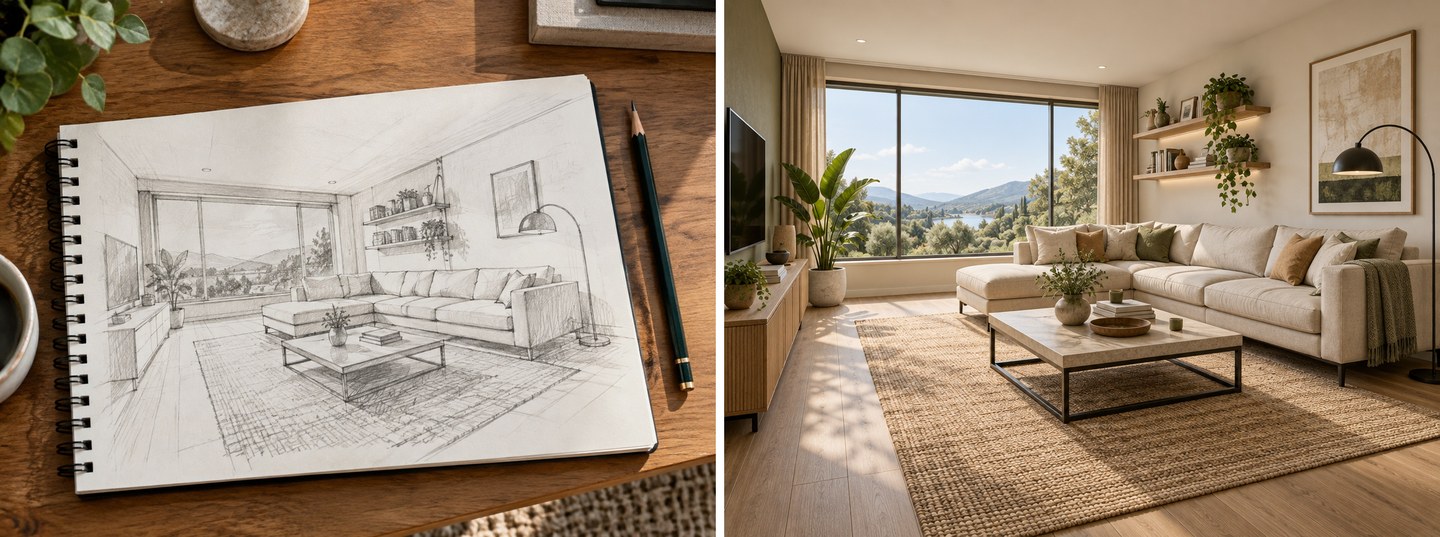 Real GenRoom Studio result: a pencil sketch turned into a photoreal render (Full makeover, no style).
Homeowners and renovators
Homeowners rarely draw well, and that is fine. A rough doodle of a room layout, or even a photo of the existing space, is enough to visualize a renovation before spending on a designer. It answers the question every homeowner asks — "what would this actually look like?" — without construction risk.
Real estate agents
Agents use sketch-to-render and photo-based AI for virtual staging: furnishing an empty or dated room so listings show potential. A quick layout sketch or an empty-room photo becomes a warm, furnished space that helps buyers imagine living there.
Is there a free sketch to render AI?
Yes — several tools offer a free tier, though free almost always means a credit cap. GenRoom's free plan gives you 6 credits (about three designs) with a free account and no credit card required, which is enough to test whether the output fits your project before you pay.
Across the market, free tiers typically range from 5 to 10 renders per month, after which you move to paid credits or a subscription. Here is how GenRoom's one-time credit packs are structured:
| Plan | Price | Credits | Key extras |
|---|---|---|---|
| Free | $0 | 6 credits (3 generations) | No credit card; AI Editor + 1 free 4K |
| Start | $9.99 | 36 credits (18 generations) | No watermark, 1 free 4K |
| Basic | $19.99 | 100 credits | Free 4K |
| Pro | $39.99 | 300 credits | Free 4K + 5 reference photos + private designs |
Pricing verified October 2026 on the GenRoom pricing page.
If you only need a handful of concept renders, a free tier is genuinely useful. If you render daily — as most designers and agents do — a paid plan with more credits, no watermark and free 4K on Basic and Pro pays for itself quickly.
Create interior design with AI
Upload a photo of your room and get a professional design in 30 seconds. First generation is free.
Sketch to render vs traditional 3D rendering
The difference is time, cost, and precision. Traditional rendering gives you total control and construction accuracy; AI gives you speed and iteration. They solve different problems.
| Factor | Sketch to Render AI | Traditional 3D Rendering |
|---|---|---|
| Time per image | 10–30 seconds | Hours to days |
| Skill required | None | 3D modeling + rendering software |
| Cost | Free to ~$40/mo | Software licenses + labor |
| Precision | Conceptual | Millimeter-accurate |
| Best stage | Ideation, client pitches | Final documentation |
| Editing | Text prompts | Manual re-modeling |
The honest takeaway: AI does not replace a construction-grade render for a build set. It replaces the slow, expensive step of visualizing early ideas, where speed matters more than millimeter accuracy.
Limitations and how to get better results
Sketch to render AI is powerful but not magic. Knowing its limits saves you frustration and helps you get usable output on the first try.
- It can misread messy sketches. Faint or overlapping lines lead to invented details. Fix: draw clean, closed shapes with confident strokes.
- Geometry can drift. The AI may nudge a window, wall, or ceiling height. Fix: use a precise input (CAD/SketchUp screenshot) when accuracy matters, and check the result against your drawing.
- It is not a blueprint. Output is a visualization, not a construction document. Never hand a render to a builder as a spec.
- Complex, unusual geometry challenges it. Highly custom or irregular forms confuse models trained mostly on conventional spaces. Fix: simplify the sketch and render in parts.
- Framing can shift. Some tools change composition even when asked not to. Fix: choose a tool that respects your linework, and lock composition where the option exists.
The single biggest lever is input quality. A confident, clean sketch photographed in even light beats a hasty scribble every time. When a result is close but not right, refine with a text editor rather than regenerating from scratch — you keep what worked.
Which sketch-to-render tool should you choose?
The market is crowded — MyArchitectAI, Spacely, Gendo, ArchiVinci, Archsynth, and GenRoom all convert sketches to renders. They differ less in the core AI and more in the details that decide whether you keep using them. Judge a tool on five things.
- Input support. Confirm it accepts your actual inputs — hand sketch, CAD screenshot, and floor plan — not just one of them.
- Style range. More styles mean fewer prompt battles. GenRoom ships 60+ styles versus the 10–20 typical of competitors, so you find the right look faster.
- Editing. A text-based editor to fix one detail is the difference between a usable tool and a slot machine. Regenerating from scratch wastes credits and loses the parts you liked.
- Output resolution. For client decks or print, you want a high-resolution or 4K option rather than a soft web-sized image.
- Free testing. A no-card free tier lets you validate output quality on your own sketch before paying — a real advantage over tools that gate everything behind a subscription.
If you design interiors, exteriors, and yards, a single tool that covers all three — as GenRoom does — beats stitching together several single-purpose apps. If you only ever render facades, a purpose-built architectural tool may feel more tailored. Match the tool to the breadth of work you actually do.
Frequently asked questions
How do I turn a sketch into a 3D render using AI?
Upload a clear photo or export of your sketch to an AI rendering tool, pick a design style, add a short prompt describing materials and lighting, and generate. The AI reads your linework and produces a photorealistic image in 10 to 30 seconds. Then refine any detail with a text instruction.
Does sketch to render AI need a 3D model?
No. That is the whole point. The AI interprets a 2D sketch or screenshot directly and generates the finished visual — there is no modeling, texturing, or lighting setup on your end.
Can AI read a hand-drawn sketch?
Yes, as long as the lines are confident and the main shapes are clear. Clean hand sketches, marker concepts, and tablet drawings all work. Faint or messy drawings produce weaker results because the AI has to guess at ambiguous areas.
How long does it take to render a sketch with AI?
Most tools return a finished render in 10 to 30 seconds per image. GenRoom generates results in about 30 seconds, so you can iterate through several style options in a couple of minutes.
Is sketch to render AI accurate enough for construction?
No. Treat the output as a conceptual visualization, not a technical drawing. It is excellent for ideation, client presentations, and design exploration, but a builder still needs proper construction documents.
What is the best free sketch to render AI?
Look for a free tier that gives you enough credits to test real projects and that supports the inputs you use (hand sketch, CAD screenshot, floor plan). GenRoom offers 6 free credits with no credit card, plus 60+ styles and a built-in editor (words and a brush) in every plan, even Free.
The bottom line
Sketch to render AI collapses the slowest part of visualization — turning an idea into a picture — from days into seconds. It reads hand sketches, SketchUp screenshots, and floor-plan doodles, then fills in realistic materials and light while respecting your composition. It will not replace construction-grade rendering, but for ideation, client pitches, and renovation planning it is faster and cheaper than anything that came before.
The best way to judge it is to try your own drawing. Upload a sketch to GenRoom, pick a style, and see your concept rendered in about 30 seconds — the free plan is enough to find out whether it fits your workflow.